15 Free Ways to Decorate Your Home: Creating a Home You Love on a Budget – Part 3

I was sitting here with my laptop, working on the last 7 of 15 Ways to Decorate Your House for Free. Then, I looked around and realize that right now, simply getting my house clean would make it feel like I redecorated! Some days are just like that, at least for me. Ok, some weeks are like that!

Though the broom is shouting my name, I still have 7 ideas to share. If you missed the first 8 ideas, you can find them here. 

9. Pine cones

I know these are typically associated with Christmas and winter decor, but I like to use them year around.  It’s an excellent, free way to add some natural elements to your decor as well as some texture.

I put them in bowls, baskets and metal containers. Small pinecones work great in vases. My daughter, Abigail has put them in a tall,  clear vase along with battery operated fairy lights. They can be made into wreaths, painted for any season and made to look like roses or zinnias.

Pinecone Zinnias, from A Fanciful Twist

How To Make Pine Cone Flowers More

Pinecone flower from The Better Nester

10. Paint

Paint can be used to up-cycle furniture, remake an old light fixture or transform a room. A front door, freshly painted in a bold, vibrant color completely alters your exterior and creates curb appeal. You probably have paint left over from other projects, but if you don’t, most cities now have a Habitat for Humanity Resale store. They always have partial cans of paint for pennies on the dollar and you’re contributing to a good cause in the process.

Home Depot usually has a section with discounted paint as well. Paint colors that don’t come out quite the way the customer wanted them end up in this area. I recently bought an assortment of their little 8 oz sample sized jars in fun spring colors for $.50 a jar. I didn’t really have a plan for the paint, but for the price, I figured someone in my house would want it for a project sooner or later.

11. Branch tea light candleholders

When my son got married two and a half years ago, we made all of the centerpieces out of large branches from my property. Equipped with the branches, a saw and a 1.75” forstner drill bit, my dad created dozens of candle holders.

These are rustic, beautiful and free. And, because they work in any season, they are so versatile!

12. Old picture frames

Old picture frames can be purchased for next to nothing at garage sales. For a unified look, paint them all one color. For an eclectic look, just mix and match. They can be layered, empty, on a mantel. Several of them can be grouped on a wall to create a statement. Use them empty, or frame photos, quotes or bits of lace.

https://i1.wp.com/www.kellyelko.com/wp-content/uploads/2015/09/staircase-gallery-wall1.jpg?resize=440%2C660&ssl=1

Gallery wall, Bless’er House

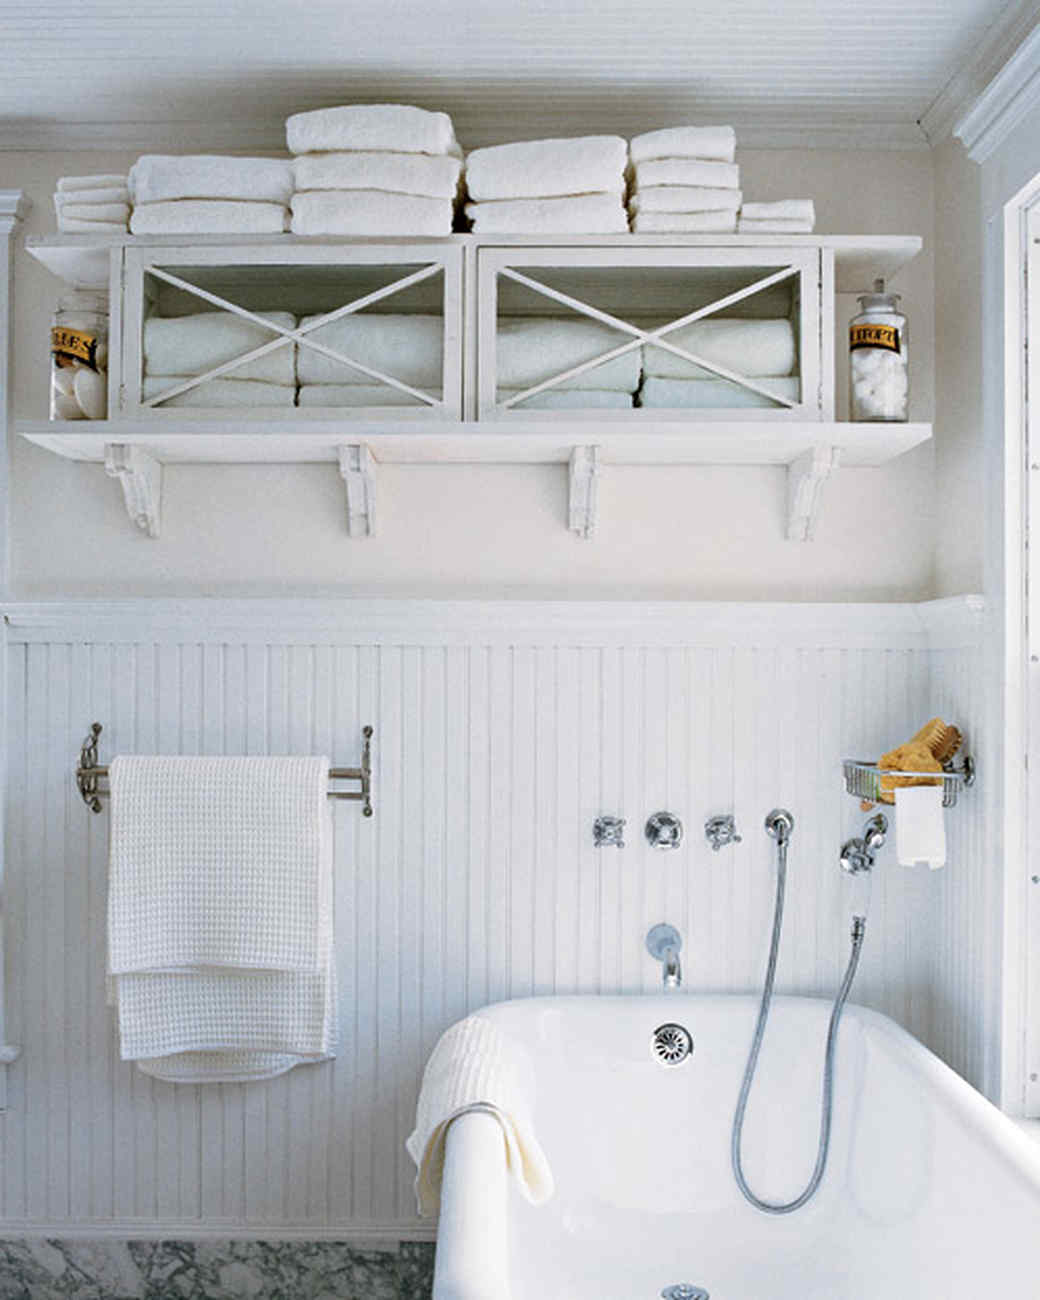
13. Quilts and throws

Quilts and throws are, of course, practical. They cover our beds and keep us cozy while we watch our favorite shows on tv. They can also take up a lot of room. I don’t think I’ve ever met a single person who said they had more closet space than they knew what do with.

So rather than try to carve out a piece of that precious real estate, just put them on display. Drape them over a sofa, hang several from a old ladder in the corner of a room or stack them on the bottom shelf of a sofa table.

https://i0.wp.com/1.bp.blogspot.com/-cfrTplRCcmo/VMgcTq1UHOI/AAAAAAAANxI/d7iIvmFHz6I/s1600/zzzzzzzzzzzzzzzzzzzzzzzzzzzzzzzzzzzzzzzzzzzzzzzzzdisplayingquilts3.jpg?resize=640%2C586

Photo from Ana White

14. Baskets

If you have baskets taking up space in a closet, why not pull them out and put them to use. If you don’t, second-hand and thrift stores always have them in abundance. I put them on top of armoires, hang them on walls, and keep my eggs and my bread in them. Tired and dated baskets can be given a clean, fresh look with a little spray paint. Stencil a number, design or initials on your baskets.

This shallow basket hangs on the wall of my dining room, but it’s not just decorative. It regularly gets pulled into use, usually when I’m entertaining. It makes an awesome vegetable basket!

When hosting large parties, this basket gets lined with a flour sack towel and is used to hold bread or rolls. Rather than find a place to store it when I’m not using it, I let it contribute to my decor.

15. Display your hobbies

If you’re a quilter, put your fabric stash on a bookcase or in a cabinet with glass or wire doors. A wooden box can hold paints and be put on display. If you don’t have a wooden box, an old drawer works great. Readers can display books.

We have horses, and though some might think it’s strange, we have halters hanging in the mudroom. If we need to catch a horse, they are quickly and easily assessible and they are a tangible reflection of our lifestyle.

Your decor doesn’t have to be perfect. It needs to represent you, who you are and what you love.

This cabinet could just as easily hold a quilter’s fabric stash.                    From Creative Cain Cabin

The key to free or nearly free decorating, really, is to shop your own house before heading to the store. What do you have that can be relocated, re-imagined, re-used? Don’t forget to shop your yard. Branches, leaves, flowers can all be used to help create a beautiful decor. Be bold. Be creative. And most of all, have fun!

I’m off to see if I can silence the pesky broom.

SaveSave

SaveSave

SaveSave

15 Free Ways to Decorate Your Home: Creating a Home You Love on a Budget – Part 2

If you follow along on this blog you know that two weeks ago I shared the first 3 of 15 free or nearly free decorating ideas. I intended to write about the same topic last week, but Mother’s Day, and my daughter moving out took me in a different direction.

So, here we are again with more affordable decorating ideas.

4. Branches

Most of us have access to a tree or two from which we can harvest some branches. This is a wonderful, free way to add nature and texture to your interiors. Use them to fill vases, create a place to hang jewelry, fashion a natural headboard, make a piece of framed art, build a towel or coat rack, or make a lampshade.

Jewelry holder, Funky Junk Interiors


Twig lampshade, Shabby Creek Cottage

You can buy this at Amazon, or simply fill a jar or vase with branches from your yard.

Headboard. Found at JenLovesKev.

5. Dishes

Rather than keeping all of your dished behind closed doors, put them on display and let them contribute to your decor. This works really well when dishes are the same color, even if they aren’t the same pattern. Feel free to mix and match.

Grouping items increases the visual impact, so rather than place individual pieces around a room, group them. For example, if you have several pitchers of different sizes, group them together and put them on display.

White dishes on display. French Country Cottage

I love the white with wood. Dear Lillie Blog.

Here’s one from Martha Stewart with brown transferware.

The dark cabinet interior really sets off the white dishes. I love the juxtaposition of the rustic cabinet and baskets with silver plate, crystal and fancier dishes. Desire to Inspire.

Dishes don’t have to be white to display well. Image found on Pinterest.

Even chippy shelves work well for display and decorating with dishes. Found on Pinterest.

6. Towels

Towels make a great decorating item simply because we all have them. Roll them up in a basket, place them on a shelf or a chair, or hang tea towels to create a valance.

Tea towel valance. If you don’t have a curtain rod, just use push pins to attach it above the window. From Debbie Doos.

7. Food

Rather than hide your fruits and vegetables away in the fridge, place them in a bowl on the counter or in the center of the dining room table. Using a variety provides color and interest whereas a single food creates more drama. Just use whatever is in season, or items that your family will eat.  Lemons heaped in a white bowl are beautiful and fresh. Fall apples in a basket are warm and homey and they smell great too.

In American, we tend to refrigerate our eggs, but when I lived in Europe this was not the case. Eggs were found on a shelf, not in a refrigerator. Since then, my eggs are usually kept in a basket on my countertop. It frees up space in the fridge and adds a farmhouse touch to my kitchen.

Yes, I know there’s all kinds of concerns about salmonella and other nasty things. I can only say I have been doing this for many, many years and never experienced any illnesses.

From my kitchen

If you like the look, but worry about the safety, simply create your own display eggs. Make a small hole in both ends of an egg. Blowing in one end will push the contents out of the other end. The empty egg can be placed in a bowl or basket with others contributing to a farmhouse decor for just a few cents.

8. Dryer sheets

I don’t know what it is about closets, but have you ever notice how newly laundered sheets go into a closet smelling fresh and clean, but when you take them out they have that not quite musty, but certainly not pleasant smell?

You’ve probably had those times, like me, when you pull sheets out of the closet to make up the guest bed and they just don’t smell good. So the clean sheets quickly go into the washer and you hope you can get them clean and dry again before your guests arrive. I really hate that.

It happens with towels and clothes too. You can spend a small fortune buying scented drawer and shelf liners and while they are certain pretty, you never really see them. Many years ago I started using dryer sheets to keep my linens and clothes fresh. I just layer them among the fabrics. Fabric items come out smelling clean and fresh. When the dyers sheets start to lose their fragrance I simply change them out for new. It’s cheap and it works.

Come back next week for more free or nearly free decorating ideas. Happy decorating!

SaveSave

SaveSave

SaveSave

SaveSave

SaveSave

SaveSave

15 Free Ways to Decorate Your Home: Creating a Home You Love on a Budget

She’s among the gentlest, sweetest young women you’d ever hope to meet. When she sings in church on Sunday, with a voice like an angel and her face radiant and glowing, I get the distinct feeling she’s sitting at the very feet of God.

Through the week, she patiently teaches little girls the art of ballet. It’s more than just plies and pirouettes. It’s instilling grace, discipline and confidence. She’s investing in those little girls, in the women they will someday become. She serves endlessly and loves selflessly.

When I noticed the email from her in my inbox, I smiled. I haven’t seen her in years and it was a joy to connect. She was asking for decorating advice. You see, though her heart is big, her budget isn’t.

Just an assortment of jars, some clippings from my yard and a piece of burlap.

A Starbucks Frappuccino jar serving as a vase and yard clippings.

When looking through Pinterest or browsing Pottery Barn, or even Hobby Lobby, it’s easy to believe that you need deep pockets in order to create a beautiful home. This simply isn’t true.

So, in honor of my sweet friend, over the next several posts, I’m going to share 15 free or nearly free decorating ideas

1. Jars:

I hate waste. Maybe it was the way I was raised. Maybe it’s because I’ve spent time in countries where poverty thrives like a cancer, choking out life and hope. Maybe it’s from trying to raise five little ones on a tight budget. Maybe it’s all of those things, but for whatever reason, I hate waste.

Image credit Jarful House. This is a fun centerpiece

Image credit  Jarful House. A jar, paint, a bracket and a piece of wood.

As a result, I often have a cabinet full of old jars of all shapes and sizes. Spaghetti sauce jars. Jelly jars. Tall skinny jars from Sun-dried tomatoes. Jars from an occasional bottled Starbucks Frappuccino. Short, fat jars from who-knows-what.

It turns out that jars make a great, free decorating accessory. Use them as vases, drinking glasses or storage. They are great containers for cotton balls, Q-tipps, and bobby pins. They can hold craft paint brushes, , pencils, make-up brushes and kitchen utensils. They can be painted, embellish with ribbon, burlap, lace and decoupage , and little things can be glued to them.

When using jars to decorate, try grouping several together to increase the visual impact. They can be the same, like in the beer bottles below, or you can mix and match. It doesn’t really matter.

Beer bottles!

2. Books

Books make great, versatile decorations. Old books can add age and character to a space. New books can be decorated with craft paper, burlap, wrapping paper or fabric.

Image credit Little Vintage Nest

Image credit Dot Com Women

If you want a unified look, create your own spine labels. For an eclectic look, simply mix books of all sizes, colors and ages.  Lay them on their sides and stack them. Prop a single book open or allow several to lean up against each other. Hang them on a wall for a clever wall display. They can even be used to create a fun, inexpensive shelf or a decorative box for holding treasures.

Image credit to Make and Do Crew


Here’s one from Fixer Upper

Image credit Nikki and Nicholas

3. Book pages

Most of us have more books lying around than we know what to do with, and if we’re honest, some of those books will never be opened again. Why not use the pages to create beautiful, free decor? Here are some ideas:

Book page Wreathes

Image credit Lace Crazy

Image credit Beehive Art Salon

Image credit Robin-Happy at Home

Book page Garlands

Image credit Tip Junkie

Image credit Love Embellished.

Book page Decoupage  – Glue shapes cut from book pages to jars, tins and boxes.

Image credit The Wicker House

Book page Basket of Eggs

This is such a fun and inexpensive idea. Simply decoupage book pages over plastic Easter eggs. These are displayed in a grape vine wreath, but you can get the same look with a bowl of twigs gathered from your yard.  Add stamps if desired.

Image credit Sew for Soul

Book page Wall Hanging

I love this! It’s simple, beautiful and again, versatile. Just choose your favorite quote.

Image credit Hogg Barn Antiques

Book page Lamp Shade

There are lots of options for covering old lamp shades with book pages. One of my favorite is using an illustrated book for a child’s room.

Image credit Amazing Goodwill

Book page Flowers

Simply beautiful. A bowl of flowers crafted from the pages of a book.

Image credit Love Embellished

Are you overwhelmed? Inspired?  Decorating doesn’t have to be expensive. Take a look around. What do you already have?  Are there other ways to use them, transform them or re-purpose them? Be creative. Be bold. And above all, have fun creating a home you love!

(Disclosure: While everything on this page can be created DYI, some of these images came from Etsy pages and the items are also available for purchase. )

SaveSave

SaveSaveSaveSave

SaveSave

SaveSave

SaveSaveSaveSave

SaveSave

SaveSave

Another example of practical beauty – the quilt

Have you ever stopped to ponder the incredible world we live in? I’ve always been an avid Little House on the Prairie fan. I still have the set of books I received for Christmas my 7th year.

My second grade school picture features me in a bonnet. Yes, I know it was odd. By the mid 1970’s, bonnets had long fallen out of fashion, but I didn’t care. I loved all things Little House on the Prairie.

To this day I still read Farmer Boy every fall. I used to read it to the kids. But the kids grew, as they are prone. Other activities vied for their time and attention. No matter. When the green fades from the leaves and the air become crisp with fall, I pull the book from my shelf and read it once again.

I love the stories about farming and family, and someday I will visit Almonzo’s boyhood home in Malone, New York.

Quilts made by my mom.

Sometimes I stop and contemplate Laura Ingalls Wilder and her life. It spanned 90 years, from 1867 to 1957. We know her stories. Traveling across the country in a covered wagon. Toiling with her family to create a life on the untamed frontier. Encountering fires, floods, sickness and all other manner of danger.

Yet, by the time she died, she’s witnessed the invention of the automobile and the availability of indoor plumbing, electricity and central heating. She could turn on a television, pick up a telephone or travel by airplane. Within a few short years of her death, we would put a man on the moon. The changes in her lifetime are simply staggering.

Another of my mom’s creations.

Available from Amazon.

Our world is still changing with unfathomable speed. I love the technologies that make life better. The ease in communication. Advances in medicine. The inventions that wash my clothes, clean my dishes and vacuum my floors.

But sometimes, in spite of (or maybe because of) all the advances and developments, I find myself gravitating to the traditional, the timeless.

A quilt made by my great-grandmother

One such timeless tradition is that of the quilt. Quilts have graced American beds for over two centuries and were an integral part of early American life. They have not grown obsolete nor, unlike my beloved bonnet, fallen out of fashion.

They are practical, beautiful, and versatile. They can work in a variety of decors, from farmhouse, to cottage, to cabin or even modern.  Some are frilly and feminine, and others bold and masculine. They can possess a variety of colors and patterns or the top can be constructed from a single piece of fabric.

A masculine cabin quilt from Cabela’s.

A whole cloth quilt. One of my favorite types of quilts. (Image from apqs.com)

Because quilts could be pieced from small scraps of fabric, they were tremendously practical and provided a way to utilize items that otherwise had lost their usefulness. I love that! Taking something that would otherwise need to be discarded and using it to create something worthwhile, practical and beautiful!

I think about those women, our ancestors. I think about their strength, determination and resourcefulness, those traits that formed the foundation for our modern lives. Most of ancestors could never have begun to fathom the relative ease and prosperity that we have come to expect.

A quilt/duvet combo. I technique I created in order to combine my two favorite bed coverings … quilts and down comforters.

While most early quilts were utilitarian in nature, quilting also provided much needed social connections. Gathered around a quilting frame, women would sew, chat, and share life’s joys and struggles, knowing that their friendships were essential to their very survival.

We are not so different today. We might not know it, the way our great-grandmother’s knew it. We may not admit it. But we need each other still.

A photo quilt I created for my mother-in-law.

What was once a practical means of survival eventually became an art form it’s own right.

Today, quilts are available in wide variety of styles of colors and styles. Rachel Ashwell’s, Shabby Chic line at Target includes several soft, pastel, feminine quilts such as the blue and white shown below.


Overstock carries a nice selection of more modern and masculine quilts. One example is shown above.

Soon, a quilt will replace the down comforter that covers my bed through the winter months.  I’ll wash it to remove the inevitable and unexplainable closet smells. I’ll hang it out on the clothesline, allowing the mountain air to permeate every fiber.

As I smooth it over my bed, I will again remember those women. I’ll remember their work, their creativity, their drive to survive and thrive in a hard land. I will imagine them, gathered around the quilting frame, sharing work and sharing life. I will be reminded to nurture and cherish friendship as if my survival depends on it.

Then, I’ll step back and smile at the practical beauty that is the quilt.

SaveSaveSaveSaveSaveSaveSaveSaveSaveSaveSaveSaveSaveSveSaveSaveSaveSaveSaveSaveSaveSaveSaveSave

SaveSave

SaveSave

SaveSave

SaveSave

Transferware – a convergence of function and beauty

Twenty some odd years ago I was sitting with my good friend, Barbie, at her dining room table. I don’t remember for sure, but knowing Barb, it’s highly likely we were enjoying a cup of Tetleys tea and eating something amazing from her kitchen. Barb doesn’t just cook, like an artist, she creates. Beautiful, delicious dishes that draw people together and invite them to linger over good food and good conversation.

As we visited to the muffled voices and laughter of the kids playing in another part of the house, our conversation turned to the dishes displayed on her china hutch. These were the start of a new collection.

Quintessential Game and Majestic Beauty, Queens

I was excited. I have a thing for dishes. I can’t explain it. I know there are those who couldn’t care less if they are eating on fine china or paper plates. I’ve never been that girl. I’ve been a dish collector for almost as long as I can remember.

Hall teapot that belonged to my grandmother.

It started with an old Hall teapot that had been my grandmother’s. I was still just a young girl and she was still alive and well. As I look back, I’m not sure how or why I ended up with it, but I did. And I loved it. Though today the faded golden butterflies look old and frumpy, as a girl, I felt very grown up and elegant when using it.

Coaching Taverns, Royal Tudor Ware. Some pieces have colored accents. Others don’t. I mix and match them.

Coaching Scenes, Johnson Bros. Similar to Coaching Taverns. I mix the patterns.

When I was twelve, our small,  local grocery store started offering Haviland Blue Garland china as a promotion. Stamps, earned with the purchase of groceries allowed the dishes to be purchased at a discount. I loved the silver trim and the soft blue of the little flowers. As a avid reader of historical fiction, I was enthralled with the concept of a hope chest. It was old fashioned and romantic, and I decided I must have one. I would start by collecting Blue Garland china.

Blue Garland

My mom saved stamps and I saved my money until I could purchase a piece of china for my collection. Eventually I ended up with service for twelve, a coffee server, and several serving pieces.

Blue Garland

That afternoon, sitting at Barbie’s table, I was introduced to a category of dishes that was new to me. Her dishes were brown and white with quaint scenes of the English country. It was a pattern called Country Days by Ridgeway.  I would learn that this type of pattern is called Transferware and it’s available in hundreds of different patterns, with different scenes and different colors.

Friendly Village, Johnson Bros.

It reminded me of toile fabric, only on dishes; two of my favorite things in one! My infatuation was instant and complete. Twenty years later I still collect Transferware.

Tulip Time, Johnson Bros. The latest addition to my collection and purchased for Abigail, my Dutch baby.

Prior to the mid eighteenth century, decorative dinnerware was hand-painted. This laborious process made it expensive and as such, it was available only to the upper classes. In order to meet the demand of an emerging British middle class for more affordable decorative dinnerware, a transfer process was created.

Flow Blue. One of the most collectable forms of Transferware. Both pieces belonged to my great-grandmother.

Images were hand carved into copper plates. Ink was applied to the plates then transferred first to thin paper, then to the pottery. The resulting product came to be known as Transferware. In addition to antique and vintage patterns, modern reproductions are also readily available. In fact, while I do own some vintages pieces, much of my collection is modern.

‘Twas the Night Before Christmas, Noble Excellence

My favorite Transferware patterns are those whose scenes tell a story. A village. A farm. A castle. A courtship. I even have a Christmas set with The Night Before Christmas poem.

One of my favorite scenes.

While vignettes form the bulk of my collection, I also have a fondness for Chintz. This Transfereware is characterized by floral patterns that cover the entire piece. It’s beautiful and decidedly feminine.

When not gracing my table, my Transferware collection serves double duty. Because it’s beautiful in it’s own right, I might display it on a mantel, or put flowers in a teapot. To me, this is the best kind of collection; one that can serve a practical function and also be used to enhance a space with it’s beauty.


SaveSaveSaveSave

How to buy the perfect set of sheets

It’s nearly that time of year again.  The days are getting longer. Easter is tomorrow. I am eagerly watching for the first appearance of bulbs while each day more green is appearing in the yard and in the field. Before long I will turn the horses out to pasture.

For me, all of these springtime events bring about thoughts of spring cleaning. It won’t be long before the down comforter that fills my duvet will be removed and replaced with something lighter and cooler. I’ll throw open all of the windows and let fresh air fill the house. I’ll clean and scrub and organize. It makes me happy just thinking about all that freshness!

Ok, if I’m honest, I will want to do all of these things. When my children were younger and so was I, I would have. But now, I will make a valiant effort. I will do some of them, but some of  the things on my spring cleaning to-do list will still be there when the leaves turn to autumn gold.

When my children were little and underfoot and needing help with even the simplest of tasks I knew it would only get easier as they grew. I was so wrong.

Now I am home less. I’m driving them from one event to another. I’m attending their activities. Their problems can no longer be fixed with a quick kiss and a band-aid, if they can be fixed at all.  This all takes time and energy. As I am more often away from home, I accomplish less at home. And that’s ok. It might challenge some of my borderline OCD tendencies, but those things don’t always serve me well anyway.

But, one task will be completed. It happens every Spring, without fail. The cozy, flannel sheets that provide comfort and warmth through the winter will be replaced with crisp, cotton percale.

Did you know that just a few years ago, the percale sheet was almost extinct?  When my sheets had worn thin and it was time to replace them, I naively thought I’d run to the store and return with new, crisp sheets. I love new sheets. I eagerly headed to the store and scoured the shelves. Microfiber sheets, cotton sateen, jersey. Thread counts claiming to be in excess of 1000, but no percale.

Hmmmm. Not to be deterred I took myself off to Tuesday Morning. They always have a lovely selection of high quality sheets at amazing prices. Again, sheets of various fibers, weaves and thread counts, but no percale.

By then I was completely baffled. Percale sheets are the classic, quintessential sheet. They were the kind your grandma had, the sheets that snapped in the breeze when drying on the clothesline. They were smooth, crisp and cool when you slid between them on a warm summer evening and their pillowcase were cool against your face.

Panic started to set in. I could not believe they were no longer available. It was simply inconceivable. I had to be mistaken, confused somehow. An internet search revealed that sadly, there was no mistake. The sheets were simply not available. I found entire websites dedicated to righting this travesty. It was the theme of more than one blog. I was not the only one missing “grandma’s sheets.”.

I reluctantly decided my existing sheets must made to last a little bit longer. Then, I did the only thing I could. Before I tell you, please promise not to mock. I know it sounds extreme. You may think I surely had more important things demanding my attention. But sometimes the little things, little comforts make all the difference. So I did it.

I wrote to two major sheet manufactures and asked them to bring back the percale. To my surprise, one of them responded with two sets of percale sheets, a cotton/poly blend and a 100% cotton. They asked me to review them as they were currently being tested for production.

Glory Hallelujah! I was happier than I’m comfortable admitting. For a minute there I thought I was going to have to figure out how to manufacture my own! That was several years ago. Today, I’m happy to report, percale sheets are once again widely available.

But what are percale sheets and why should you care? In today’s world most sheets are not inexpensive and you spend 1/3 of your life in bed. Sheets represent an investment of both money and time. But, the choices in sheets are wide and often confusing. In order to help clear the air, I’ve created a sheet buying guide. You can find it here, as well as my recommendation for percale sheets that are beautiful, durable, the perfect blend of soft and crisp and best of all, they are affordable.

And if you couldn’t care less what makes a good sheet, but still want the recommendation, feel free to just scroll to the bottom of the guide!

What happened when my favorite lamp tried to burn the house down

Last week I was sitting on the couch going through old photos from an external hard drive. I have tens of thousands of photos and most are in no particular order other than loosely chronological. They are in desperate need of some organization.  I was intent on my work when I suddenly smelled something burning. I felt the hard drive, the connection to my computer, the electrical plug and nothing felt hot so I turned to the fail-proof smell test. I sniffed those same items and still nothing seemed amiss. It was odd, I thought, but obviously everything was ok.

I set the hard drive and my computer aside and went to prepare dinner. Later, when I returned the sun had dropped behind the mountain so I reached for the nearby lamp. When I turned the switch, nothing happened. I replaced the bulb, thinking it odd since it hadn’t been long since I’d done that,  but still nothing. Upon further inspection, I discovered the source of the earlier burn-y smell. The plug on the lamp had burned. I was a little bit shaken, realizing what could have happened and more than a little grateful.

This lamp was my grandmother’s. I can’t remember a time when it didn’t sit on her end table. As a child I was obsessed with Little House on the Prairie and all things old-fashioned so a lamp shaped like a little potbelly stove was nothing short of enchanting. Saturday was cleaning day at Gram’s and if my brother or I happened to be there on Saturday, we knew we would be expected to help. I was responsible for ironing Gramp’s hankies and for dusting. Countless times, with the dust rag cut from my grandfather’s old t-shirt in hand, I carefully wiped the shiny black surface of this little potbelly stove lamp.

When we lost my Grandma, I got the lamp. It’s been mine now for nearly two decades and even though I’ve changed the shade,  I would not think about getting rid of it.  I love the memories. I love the nostalgia and I even still love the style.

When my little lamp threatened to burn my house down, I knew I needed to take action. One thing was for certain, I could not throw this old friend away. Since I was also unwilling to risk a fire, I cut the wiring out of the lamp and removed it so it could not be turned on by mistake. Then I did what every resourceful woman does …  I went to Amazon. I found this lamp kit and promptly ordered it.

Lamp with wiring removed

New wire pulled up through the lamp and the base slid over the wire

Wires attached to the socket

Cover and cardboard insulation added

Ready for the bulb and shade

Finished! It took longer to write about it than it did to do it!

If your shade uses a harp, you can install the harp that is included with the kit. My doesn’t so I just left it off.

When it arrived, I tore into the box and in well under half an hour, the lamp was repaired and functioning safely again. I have several old lamps and light fixtures.  It might be time to update them, if only for my peace of mind.

These kits are great for creating your own lamps too. Use your imagination to create a unique, one of kind lamp out of an old cedar fence post, a teapot, or a baseball bat. The possibilities are only limited by imagination!

It’s true that decorating styles change. Not that long ago many people hadn’t even heard of shiplap! That’s part of the fun with interior decorating. There’s an ever changing opportunity to be creative. Regardless of the trends there are some items that will always be a part of my home. I might remake, repurpose, paint, repair or re-imagine them, but I won’t get rid of them because the people, places and memories associated with them are a part of me.

4 Distinctions Between A Designer and a Decorator and why you need to know the difference

There’s something about the New Year that makes us want to clean, organize, purge, remodel and redecorate! I’m no exception. Though we’ve had an unseasonably warm and dry winter, Monday morning was cold and cloudy. I watched from the window as the  ice and sleet turned to snow. It seemed like a good day to spend a little time sitting by the fire and working on the plans for the organizing, remodeling and redecorating I want to do in this New Year.

I’m not alone. Many of my friends and family are embarking on home projects. I think there’s something innate in most of us that causes us to want to create beautiful living spaces. Certainly, networks like HGTV and DYI have tapped into this and it’s made them very successful.

Sometimes, as you embark on your project you might find that you could use a little help. But getting help can be confusing. For example, Interior Decorator and Interior Designer are titles that are often used interchangeably. While there is certainly overlap, there are really two distinct things. If you’re seeking help with your projects, make sure you understand the difference so you get the help you need.

So, what is an Interior Decorator and what does he or she do?

  1. Interior Decorators address the aesthetics of a space. They are responsible for applying the finishing touches to an area. They choose colors, fabrics, textures and furnishings. It’s their job to make sure these things work together to express the preferences and personalities of their clients.
  2. They work within the confines of an existing space to make it beautiful. In addition to applying finishes, they determine furniture placement. Correctly placed furniture enhances the functionality and beauty of a space.
  3. They often shop for their clients, sourcing furniture, fabric, finishes, curtains, rugs and decor.
  4. While there are courses available for Interior Decorators, there is not a licensing requirement.

Interior Designers, on the other hand address the function of a space. Of course, function has a tremendous impact on the aesthetics, and sometimes Designers will also function as the Decorator as well, but Designers work within a scope that is deeper and wider than that of a Decorator.

  1. Designers need to be knowledgeable and aware of building code and structural requirements. They need to understand the building process because they may need to suggest moving walls, doorways, windows, plumbing, or even building an addition.
  2. Designers can work directly with architects, engineers and contractors.
  3. They seek to understand how a client will use a space.  After understanding the needs and desires of a client, they will design structures and changes to best meet those needs.  Again, these could include structural changes. They consider how light, sound, heating and cooling will affect the comfort and function of a space.
  4. In most states, Designers must meet educational and testing requirements and be licensed before they can claim to be a Designer.

So next time you’re in the middle of big project and decide you need some help, you’ll know where to turn. In the meantime, if you’re tackling a DYI project and get a little stuck, send me an email. Chances are good I’ve tackled it at one point or another, mostly because I am addicted to remodeling and decorating. I really would love to help!

5 Quick, Homemade, Budget Friendly, Last Minute Gift Ideas

In just three days the sun will rise on a Christmas morning. All of the preparations, whether complete or not will be set aside for the celebration. The weeks of planning and busyness will cease,  the stress and planning will fade making way for peace, joy, and laughter as we celebrate that baby in the manger, Emmanuel, God with us.

If, in these final days before Christmas you find yourself in need of a last minute gift and a budget that is nearly exhausted, here are five homemade, budget friendly, last minute gift ideas. Each is easy to make, useful and can be beautifully presented. You could buy them in a store but in less time that you would spend fighting traffic and for a fraction of the cost, you can prepare these at home. All of them make terrific gifts!

Chocolate Chip Cookies in a Jar

(I saw these at Walmart for $6.00 a jar)

Ingredients:

1 3/4 cup flour

3/4 teaspoon baking soda

3/4 teaspoon salt

1/2 cup granulated sugar

3/4 cup packed brown sugar

1 1/2 cups semi-sweet or milk chocolate chips

1 quart sized mason jar, or equivalent jar, such as from spaghetti sauce.

Directions:

Combine the flour, baking soda and salt. Place in your jar. Tap around the edges with a spoon to pack it.

Add the brown sugar next and tap it down as well.

Add the white sugar followed by the chocolate chips.

Baking Instructions:

Preheat oven to 375 degrees F.

Beat 3/4 c. softened butter, 1 large egg, and 3/4 tsp. vanilla in a large bowl until fluffy. Add the contents of the cookie mix jar and mix well making sure to incorporate any clumps.

Drop by the spoonful onto an uncreased cookie sheet and bake for 9-11 minutes. Let set for a couple of minutes before removing to a wire rack to cool. Makes about 2 dozen.

Click here for a printable version of the recipe.

You can find a printable instruction label here. It can be tied around the jar or glued to the back using a glue stick.

Peppermint Body Scrub:

Ingredients:

4 cups white sugar

1/4 cup crushed candy canes

1 cup olive oil

20-25  drops peppermint essential oil

You will also need a glass jar.

Directions:

Measure and pour the sugar into a mixing bowl. Sugar is a wonderful exfoliant.

Add the olive oil to the sugar, and stir. This should look like damp sand. Be careful not to use too much oil, just enough to dampen the sugar.  If the sugar is too dry after adding a cup of oil, you can add more, 1 tablespoon at a time until you reach the desired consistency.

Add peppermint extract.  Peppermint has been shown to reduce depression related anxiety, sore muscles, headaches and skin conditions.

Place a handful of your crushed candy canes in a ziplock plastic bag, and make the pieces even smaller with the help of a rolling pin. Alternatively a food process works great. The candy should be similar in texture to the sugar.

Place some of the sugar-and-oil mixture at the base of the glass container, and then sprinkle with a layer of the crushed candy. Continue layering until the container is filled. Use ribbons or fabric to decorate the jar. Makes approximately 4 cups.

For a free printable recipe click here.

Brown Sugar Vanilla scrub:

Ingredients:

1 cup of packed brown sugar

1/2 cup olive oil, (almond oil is great too)

1 tsp of vanilla extract

Optional: 1 teaspoon of vitamin E oil, or 1 teaspoon of coconut oil.

Mix all ingredients until the mixture resembles wet sand. Put mixture in a jar. Use fabric and/or ribbon to decorate the jar.

For a printable recipe click here.

Hot Chocolate Ornament:

The ornament pictured here was created by my daughter, Alia.

Ingredients:

Hot Chocolate mix of your choice.

Candy cane, coarsely chopped.

Glass Ornaments

Directions:

Using a funnel, place enough hot chocolate mix for one, 8 oz cup in a clean, glass ornament.

Add the chopped candy cane.

Replace the top, and add a ribbon by which to hang it.

To use, empty contents of the ornament into a cup, add 8 oz of hot water and stir. These are fun little gifts for kids!

Cider Mulling Reindeer-

(Makes 6 Reindeer)

Ingredients:

3 Large oranges

3 cups firmly packed brown sugar Mulling Spices (I used this recipe)

6 small whole nutmegs

12 whole allspice

36 whole cloves

6 Red Hot Candies

Black Edible gel food coloring or edible marker

Directions:

Slice 3 the oranges in half, and scoop out the flesh. Take care to avoid breaking through the outer orange rind. Crumple up tinfoil into small balls to fill your orange halves. Place orange halves cut side facing up, on a baking sheet. Bake at 225°F for 3 hours, until dry and hard. It might help to turn the over about 2 hours into the baking time. Cool the oranges completely. Pack your mulling spices firmly into each orange half.

Creating the Reindeer:

Place a whole nutmeg in the center to make the Reindeer head. Push it firmly into the mulling spices. Using a food safe marker, create the eyes. Food safe gel dye can work too but I find it tends to smear. If you choose this method, paint the eyes a day ahead to allow the gel to dry thoroughly. Place a red hot candy at the base of the nutmeg to form the nose, then  place 2 whole allspice as ears on either side of the nutmeg. Use 6 whole cloves on each Reindeer head to form the antlers.

Wrap your Reindeer Mulling Spice tightly in plastic wrap.

To use, place the entire Reindeer in a gallon of Apple Cider or Juice and simmer.

A printable version of this recipe can be found here.


Why We Made Our Own Christmas Wrapping Paper and the Unexpected Gifts it Brought

14 moves in 18 years. That was the reality for my son Joseph. In his 18th year he calculated the number of moves we’d made in his lifetime. 14 …  14 in 18 years. Some of those moves were across town, but some involved packing up every earthly possession and 5 kids, and boarding an airplane to fly halfway around the globe.

Boxes, bubble wrap, packing paper and packing lists. I have a well-developed, extensively tested system for packing, moving and unpacking a household. But that’s a post for another day.

In an early move, when bubble wrap was beyond my budget,  I discovered that the newspaper office sells “end rolls”. When they run the paper through the printing presses there is always some left on the roll. Those are the end rolls. Not only that, they can be purchased for next to nothing, currently $1.50 at my local paper. The diameter will vary.  I have had rolls as large as 18” across. Through the years, we have used miles of this stuff. It makes fantastic packing paper and it’s much more budget friendly than bubble wrap.

One of my favorite uses for the end roll is wrapping paper. Throughout most of our life, the monthly income would fluctuate, sometimes quite drastically. One December we were hit particularly hard. I had no idea how I would buy presents for the kids let alone paper with which to wrap them.

After I’d figured out how to have something for them under the tree, I still had the dilemma of how to wrap those gifts. Then it occurred to me. I had a newspaper end roll. I had planned to create stamps out of potatoes but I happened onto two foam angel stamps marked down to mere pennies.

At home, I gathered the kids around, unrolled the paper across the table, retrieved a bottle of gold paint from my craft closet and spread it on a plate. I carefully showed them how to place the stamp in the paint then on the paper. The three of them shared the two stamps and before long we had a nice roll of glittery, golden, angel wrapping paper.

Every present, purchased or made was wrapped in golden angels. It didn’t matter that the paper was all the same. The golden paint caught the lights from the tree. The packages shimmered and the kids beamed. They proudly showed their creation to guests and visitors.

That started a favorite tradition. We didn’t always make wrapping paper but every couple of years we would return to the practice. We added stamps to our collection. As the kids got older, more creative and more skilled the end product changed. But the shared fun, the bonding, the sense of pride, the love, these things remained.

For this post, I anticipated making some paper while the kids were at school or work. Then the girls got wind of my plans. The protests were loud and complete. Three girls (those kids still at home), three voices, making their desires known. They wanted to help! You aren’t going to do that without ME?!

So, with a great deal of effort, we found a time when all were home and homework was done. An iPhone provide the Christmas music, an essential element of the experience.  Three girls, ages 21, 18 and 15 gathered around the table once more. We pulled out the paint and paper and stamps and they went at it.  I think they enjoyed it as much last night as they did when they were children!

I smiled, not the smile that is merely a polite expression on one’s face, but the kind that reaches to the very soul. The kind that reflects a heart at peace and full of joy, a heart that has found a moments rest among the busyness of life and of this season. A heart that remembers the meaning of the season because the love of the season is reflected in the faces of her children.

We laughed. Anna painted a star and announced she’d created a self-portrait. Later she painted a gift box and announced the same, “I’m a gift,” she said. Yes, she certainly is. Then she stamped out golden angels at a pace to rival the printing press. Alia was slow and meticulous, using brushes to add detail to her stamped images. Abigail’s boisterous voice filled the room and shook the rafters as she bent over her section of the paper.

We wanted a snowflake and a star so we carved them out of potato halves creating our own homemade stamps.

They decided hand prints would be fun, and paper with their handprints would be perfect to wrap my gift . They painted Anna’s nose red, and she posed her gold paint covered hands to resemble antlers as another girl snapped a photo.

Amidst the laughter and painting one of the girls paused and thoughtfully asked, “Did we make paper when we were little because you didn’t have money for wrapping paper?” Silence. Where noise and laughter had echoed seconds before, silence. 3 sets of eyes, all turned to me, all waiting for this answer. I am not sure why it mattered to them, but I knew it did. I knew this question was about more than wrapping paper. “Yes,” I said. “Initially, that is how and why the idea came to me. But you guys loved it and it gave you such pride and that’s why we continued.”

I went on to explain to them that sometimes the hard circumstances in our lives can lead us to things we might not have found otherwise. We had some tough years, especially early on, but without those years I do not think I would have taught myself the things I did. I would not have developed some of the skills and creativity that I so value, that have become a part of who I am.

It’s been said that necessity is the mother of invention. This is truth has been born out in my own life time and time again. And sometimes, the result is so much more than even our wildest hopes can imagine. That Christmas, all those years ago, I was simply looking for a way to wrap gifts for my littles.

I got that and something infinitely more important and precious. That need created treasured memories for my kids. It gave their little selves a sense of accomplishment and pride. It fostered creativity and created a space for laughter and fun and love. The times we gathered around the table with stamps and paper and paint are worth a thousand times more than the money I saved on the wrapping paper. Store paper would have been forgotten as quickly as it was crumpled into a black trash bag and put in the bin.

I doubt the kids can tell you what they got for Christmas that year. But they remember the paper. Because ultimately it wasn’t about paper. It was about family, about memories and creating, about being together, and laughter and love. As we celebrate that baby in the manger, the very essence of love itself let’s not forget that here is where the real magic of Christmas is found.